Overview
This guide details the necessary steps to establish SSO for BambooHR using BeanLogin.
The guide assumes that you already have an existing BambooHR subscription with Admin privileges to enable SAML.
| Create As Password-Vault App | Create As SAML App | User Provisioning Supported |
| Supported | Supported | Supported |
SSO Configuration in BeanLogin
Below are the steps involved in configuration of SSO for BambooHR with BeanLogin.
- Login to BeanLogin as an Administrator.
- Navigate to Administration >> Access Management >> Corporate Apps.
- Click New.
- Select Slack from the list of apps and click it will give option whether to add as password-vault/SAML based on choice select the proper option and click on Add Selected Apps. It will add apps under corporate section with status as inactive.
- Open App in Edit mode, enter the domain name and Make note of the “Entity Id” value. This is required to enable SSO within BambooHR.
- To enable the provisioning, enable the provisioning checkbox on the last screen of widget and provide the API Key got from the BambooHR.
- Click Submit.
SSO Configuration in BambooHR
-
- Sign in to https://{your_domain}.bamboohr.com with your organization’s BambooHR administrator account.
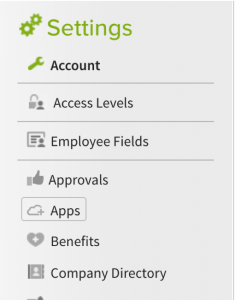
- From the BambooHR home page, click the Settings icon at upper right.

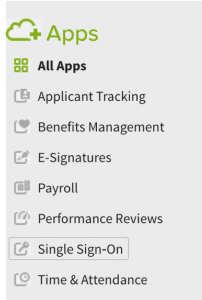
- Click Apps from the left hand pane.
- In the Apps list at left, click Single Sign-On.
- On the Single Sign-On page, click SAML.
- On the SAML Single Sign-On page, click Install.
- In the SSO Login URL field, enter the SSO URL as below, where EntityID is what you copied in Step5 when configuring SSO within BeanLogin. https://host_name/Federation/SAML2SSO.aspx?idpid=xxxxxx-xxxxxx-xxxxxx-xxxxxx
- host_name is the current BeanLogin site URL.
- In the x.509 Certificate field, paste the certificate you downloaded in Step MIIDzDCCArQCCQDCN6phKMHdHzANBgkqhkiG9w0BAQsFADCBpzELMAkGA1UEBhMCVVMxEDAOBgNVBAgMB0dlb3JnaWExEDAOBgNVBAcMB0F0bGFudGExGjAYBgNVBAoMEUEmSSBTb2x1dGlvbnMgSW5jMREwDwYDVQQLDAhTZWN1cml0eTEhMB8GA1UEAwwYZmVkZXJhdGlvbi5iZWFubG9naW4uY29tMSIwIAYJKoZIhvcNAQkBFhNhZG1pbkBiZWFubG9naW4uY29tMB4XDTE4MDUxMTE4NDU0M1oXDTIwMDUxMDE4NDU0M1owgacxCzAJBgNVBAYTAlVTMRAwDgYDVQQIDAdHZW9yZ2lhMRAwDgYDVQQHDAdBdGxhbnRhMRowGAYDVQQKDBFBJkkgU29sdXRpb25zIEluYzERMA8GA1UECwwIU2VjdXJpdHkxITAfBgNVBAMMGGZlZGVyYXRpb24uYmVhbmxvZ2luLmNvbTEiMCAGCSqGSIb3DQEJARYTYWRtaW5AYmVhbmxvZ2luLmNvbTCCASIwDQYJKoZIhvcNAQEBBQADggEPADCCAQoCggEBAL+TL/JsIkoP/xC8OIEoLyAVqBmw1ZwtmhPjGNeEBpC7Qzu9sWDGvoJXOuOwZXOZYv54ovwNOBLYeqbtp1isG5+owpP2a3vmf4r84HTg1sUzLer/zmBO2gP1Jfa6h/nxuUWU3uiXY9aQQ94tXQ50t+ZkP05rOck+i/XNqgad+rAnSs/GIpKXfz9PYAMuXumr/mS0gO3496h2WWO0XKbgL/w8diuHjom/Uc7LIOGA8I8I23cDtnVJkeOax6rO5MsLUJkKTscoKalHBVet+FiDzvVU6omUk2+vnLlEAgdG1rSIvqlbDDvS2GbG4SDXj2JKsquP5AcBJ/o0UbAALmTF5lkCAwEAATANBgkqhkiG9w0BAQsFAAOCAQEABSdo5WyVsZDBWaWQ2LkrHkBeovjXkFEl4HA2iXEJSaaKi8zVBFZfzFs5VD9k7JNSZQMqzKhf0NRbiWuP3WqNm7QlB6WRZ2T/gUt9vv2traTh/WTi5ZD4Sk6g1fKnq3Xo+ZkEiJkZvHVzYlh9eJyq5g+Swc8qxie1MZ0Lz6tOvOc3g3omVNHUcX34TBn0hRobYKCJyfHWsTce9L7UiUlN9A0JtyAfgsmkhbiriSQHJxc/qkeNTG6Pk3KDB1HGYQ60Pa9/Kwmtb/bQH0gXxk/YXGXt52IYd2o2TNd8800nYTr9e94JdaP45ppuyrMp7ET0FkP/1rGoi8MyHG+f4uSBRA==
- Click Submit.
Provisioning Configuration in BeanLogin
You can enable the provisioning from the two places
- From Corporate App Edit where you have last step as Provisioning.
- From Identity Management -> Endpoint Provisioning Section.
Once you enabled the provisioning don’t change any other value from page, only get your Bamboo HR API Key and enter it into API Key text box.