Overview
Confluence is a collaboration tool used by teams for Wiki, Documentation, and Knowledgebase. This guide captures the necessary details to establish SSO for Confluence using BeanLogin. Please note that there can be some unique use cases that are specific to your Organization and not all use cases are detailed here. You may be required to tweak the configuration to suit your needs.
Confluence requires the use of a plugin for enabling SAML SSO. For the purpose of this integration, we have used SAML SingleSignOn plugin. Installation of the plugin is out of scope of this document.
Federation Worksheet
| Parameter | Value | Comments |
|---|---|---|
| BeanLogin Metadata URL | https://portal.beanlogin.com/federation/saml/idp.xml | This is the URL containing BeanLogin Metadata |
| BeanLogin SSO URL | https://portal.beanlogin.com/Federation/SAML2SSO.aspx | This is the URL to which the application will send authentication and logout requests |
| BeanLogin IdP Token Signing Certificate | Export the certificate from the BeanLogin Interface | Token Signing Cert to verify the digital signature |
| Confluence SAML URL | https:// | This is the Confluence SAML URL |
| Confluence Assertion Consumer Service URL | https:// | This is the URL to which the SAML2.0 Assertion will be posted |
| User Attributes | EmailAddress, FirstName, LastName | List of user attributes Confluence needs in the SAML 2.0 Assertion |
| Protocol to be used | SAML 2.0 | Confluence plugins in the Atlassian Marketplace support SAML 2.0 |
| NameID Parameter | EmailAddress | |
| Logout URL | This will be used when Application sends a signout request to BeanLogin. Once a user is successfully signed out, BeanLogin can redirect to this URL. |
Configuration of the application within BeanLogin
Below are the steps involved in the configuration of an application within BeanLogin.
- Login to BeanLogin as an Administrator.
- Navigate to App >> Corporate >> Register New App.
- Configure the application with the details from the worksheet.
Configuration of BeanLogin as IdP within Confluence
- Log in to Confluence as an Administrator.
- Navigate to Confluence Administrator screen.
- Select SAML SingleSingOn from the left-hand pane.
- Click Add IdP.
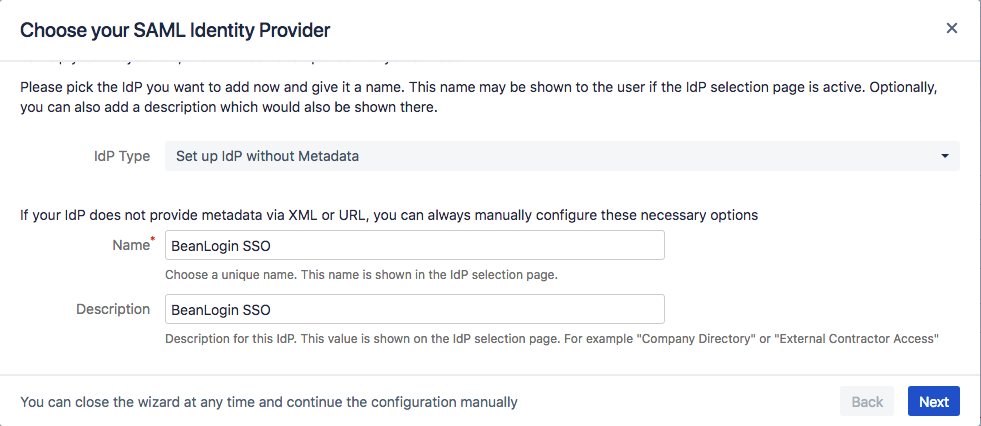
- Enter the following information on the Choose your SAML Identity Provider Screen. Click Next.
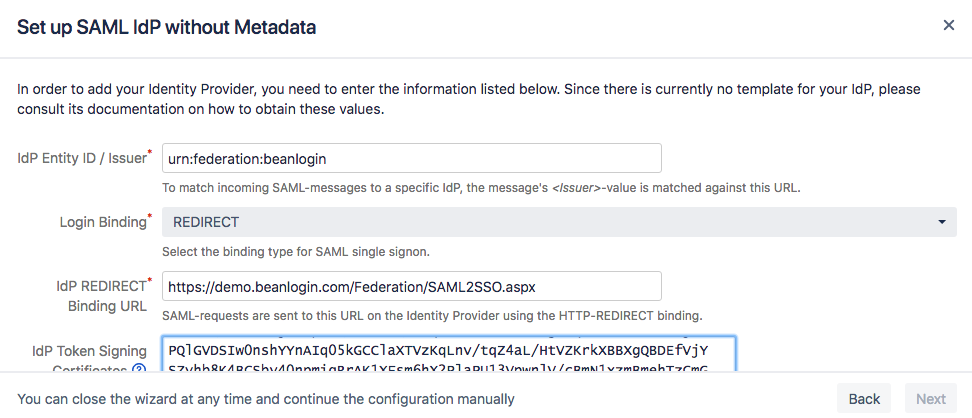
- Enter the following information on the Setup SAML IdP without Metadata Screen. Click Next.
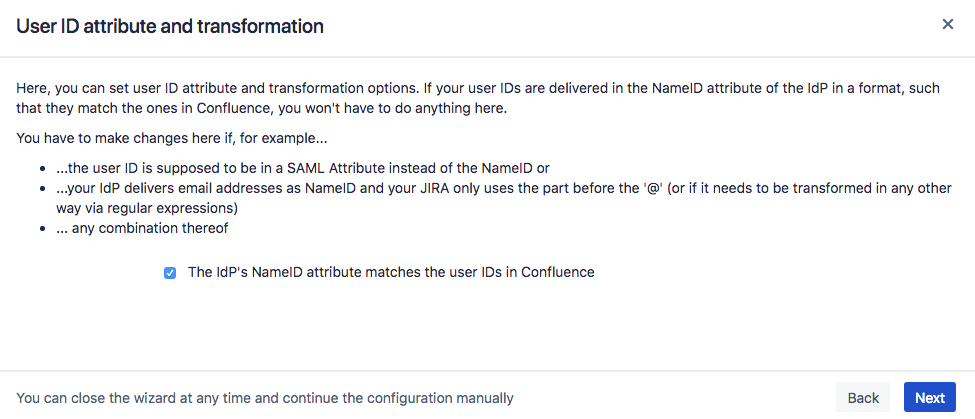
- User ID Attribute and Transformation.
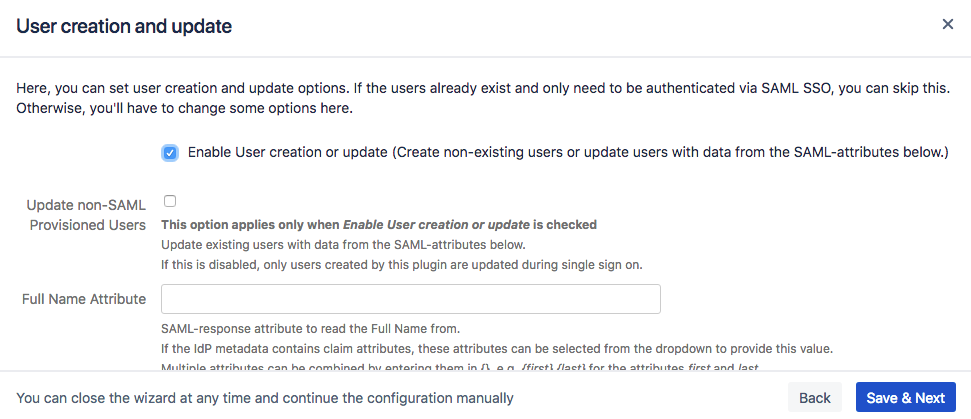
- Enable User Creation and Update.
- Confirm the settings on the screen.
- Click the Test button to test the authentication.